12.09.2015

Have Yourself A Merry Little Hop


Welcome to the December 2015 Stylin' Stampin' INKspiration blog hop! We're so happy that you're joining us today. We are featuring Christmas this month, and I will be featuring an easy DIY Christmas present. 

As you hop along, please be sure to comment and show some love on every blog! We are always excited to hear from our followers! You should have just left stop number 1 on the Stylin' Stampin' INKspiration Blog Hop - Jennifer at Jenny G Paper Crafts. If so, you are in the right spot. If a link doesn't work or you get off track, you will find the full blog hop lineup below.

Now, how about some DIY fun? This French Bulletin Board was so quick and easy to make.


All you need is a 12 x 12 Cork Tile (I found mine at our local stationary store), your favorite 12 x 12 Stampin' Up! Designer Series Paper, your favorite Stampin' Up! ribbon, and your favorite Stampin' Up! brads.

I used Crystal Effects to glue my DSP to the cork board. A word of caution: go easy with the Crystal Effects. I was spreading it with a sponge, and thought that I wasn't getting enough, so I poured a whole lot on there, and it caused my paper to bubble a bit.

Once your adhesive is dry, then place your ribbon where you would like it. I used the mini brads to tack it to the edges of the board, and then used the Antique Brads to make my pattern on the front.

After you gift it to your favorite person (or keep it for yourself), they can fill it with cards, pictures, artwork, or more!


Thanks for stopping by. I hope you can put this to great use, especially if you have some last minute gifts to make! It's now time to head over to check out what Diana has to share with us today!


Blog Hop Participant List:

  1. Jennifer at Jenny G Paper Crafts
  2. Darcy at Dj's Stampin Place
  3. Diana at Stampin Fun with Diana
  4. Bree at Craft-Somnia Momma
  5. Leanne at Literally My Joy
  6. Laura at Crafty Chicks Creating
  7. Melissa at The Stamp Doc
  8. Kim at Stamping with Kim
  9. Heidi at Stuck on Stampin'

Built for Free Using: My Stampin Blog

11.11.2015

Mystery In the Blog Hop


This month for our Stylin' Stampin' INKspiration Blog Hop, we are using our Mystery Swap theme. Each participant sent three items (or four) to another participant, who then had to use all of those items in some way on their project.

My items came from Donna, and while I forgot to take a picture of what she sent me before I got started, here are the items from the online store images.


Before we get to the main event, you should have just left stop number 1 on the Stylin' Stampin' INKspiration Blog Hop - Jenn @ Happy 2 Scrap 4 Life. If so, you are in the right spot. If a link doesn't work or you get off track, you will find the full blog hop lineup below. Please leave us some blog love as you hop along. We always love to hear from our followers.

So what did I make with the four items that Donna sent me?


I colored the cute little dude with some Classic Ink Pads and my Blender Pen. You have to look really close to see it, but I strung the Silver Metallic Thread through the button in an X. Those Metallic Doilies are on the Weekly Deals this week! I'm definitely going to grab some while they are on sale! They make a great layering piece!

From my own stash, I used Mossy Meadow card stock for my base, the Winter Wonderland Vellum, some of that fabulous Corrugated Paper, and some Perfect Plum Candy Dots from the Regals collection. I also stamped a greeting from Happy Scenes in Mossy Meadow on Perfect Plum card stock. I cut that out with the Bitty Banners framelits. One final detail: that fabulous Curvy Corner Trio Punch!

After looking at this card, I've now got "Silver & Gold" from Rudolph, the Red-Nosed Reindeer running through my head! Now that I've got you singing it too, it's time to head over to see what Tobe received for her Mystery Supplies and what fabulousness she created with them!


Blog Hop Participant List:
  1. Jenn at Happy 2 Scrap 4 Life
  2. Darcy at Dj's Stampin Place
  3. Tobe at The Craft Sea
  4. Donna at Geek Squad Crafting
  5. Carrie at Carrie Stamps
  6. Jennifer at Jenny G Paper Crafts
  7. Tonya at Stampin with Tonya
  8. Kim at Stamping with Kim
  9. Leanne at Literally My Joy
  10. Diana at Stampin' Fun with Diana
  11. Darla at Stampin with Darla & Sisters
  12. Laura at Crafty Chicks Creating
  13. Heidi at Stuck on Stampin'

11.04.2015

Stamp Set Focus: Layered Letters Alphabet


Stampin' Up! offers many great alphabet sets, and today at Stylin' Stampin' INKspiration, the designers are featuring a few of them. My focus is on the Layered Letters Alphabet.
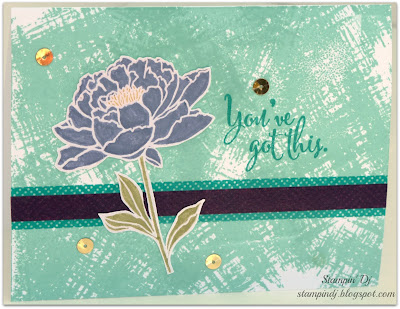

I'm on a mission to create a thank you card (or project) for as many posts this month as I can. That made it easy to decide what I was going to spell out with my alphabet stamp set. However, then I wondered what else I would do. The Crazy About You stamp set was delivered today, and as I was putting it together, the Just Sayin' jumped out at me.

My suggestion for you is this: if you are purchasing a set that has lots of phrases, and little ones at that, such as Crazy About You; invest in the wood-mount. You will get a crisper image when you stamp with it.

Also, I had heard to put the Stampin' Pierce Mat under your project when you're stamping with photopolymer stamps for a crisper image. Typically I don't have issues with my photopolymer, but this alphabet set (which only comes in photopolymer) was giving me fits. The pierce mat trick definitely works!

How else would you use your favorite alphabet stamp set?

Built for Free Using: My Stampin Blog

11.03.2015

Creating A Background

Stampin' Up!'s Designer Series Paper is a great addition to almost any card because it's an easy element or background to really elevate that card. However, sometimes you may not have exactly what you're looking for in your DSP stash. Today at Stylin' Stampin' INKspiration, we are creating our own Designer Series Paper for Technique Tuesday.


Creating your own background is super easy. In my example, I used one stamp set, Garden In Bloom. I stamped each stamp in random patterns, covering my entire layer. This really allowed me to use my background as my focal point. What is your favorite Stampin' Up! stamp set to create backgrounds with?

Today, I fell in love with Mossy Meadow all over again.

Built for Free Using: My Stampin Blog

11.02.2015

#SSINKCC27: Color Challenge


Is anyone else starting to have anxiety about Blackberry Bliss retiring next year? I really hope it shows up as a part of one of the color families in the near future! Our color challenge today features it, as well as Cherry Cobbler and Old Olive.


Here is my first card of gratitude for November. It features the Work of Art stamp set, as well as the Watercolor Thank You. On my practice run, I stamped the swooshes perfectly, but on the actual project, no dice. Therefore, I grabbed my Stamp-a-majig so that they would be lined up and placed exactly where I wanted them!

Check out how the other DT members were inspired by this color challenge at SSINKspiration. While you're there, we'd love to have you play along with us!

Built for Free Using: My Stampin Blog

10.09.2015

CASEing the 2015 Holiday Catalog

Do you ever look to the Stampin' Up! catalogs for inspiration? That's exactly what the designers at Stylin' Stampin' INKspiration did today!


My CASE (copy and share everything) came from page 42 of the 2015 Holiday Catalog.


It was marked as one of the quick and easy cards by Stampin' Up!, and I would say that that is an accurate statement!

  • Tangerine Tango card base: 4" x 8" - scored at 4"
  • Brights Designer Series Paper Stack: Tangerine Tango: 3" x 3"
  • Perpetual Birthday Calendar stamp set
  • Tangerine Tango ink
  • Tin of Card stamp set
  • Cucumber Crush ink
  • Circle Collections framelits
  • Smoky Slate Thick Baker's Twine
  • 2015-2017 In Color Blossom Accents

Built for Free Using: My Stampin Blog

10.07.2015

Stamp Set Focus: Hostess Sets

Inadvertently, this week's cards seem to be the "week of orange." It is October however, so I think lots of orange is allowed!

Today at Stylin' Stampin' INKspiration, we are featuring projects made with Hostess Exclusive Sets. These sets can be found at the back of the catalog, and can only be purchased using hostess dollars. There are some really cute sets available, therefore, I think you should book a party today so you can get them for yourself!


I had signed up to participate in last month's Mystery Supply Challenge, however I wasn't able to get my card made. I used half of the supplies that Jenn sent me for the card. The two "Boo!" pieces are thanks to Jenn! The bat background is from a Project Life card kit. Project Life: not just for memory keeping!

  • Pumpkin Pie card base: 4-1/4" x 11" - scored at 5-1/2"
  • Seasonal Snapshot 2015 Project Life Card Collection
  • Six Sayings hostess stamp set
  • Bermuda Bay ink
  • Basic Rhinestones

Built for Free Using: My Stampin Blog

10.05.2015

#SSINKCC26: Color Challenge


Well after quite a hiatus, which was caused by many things in life, I'm back to join the design team in this month's color challenge. There is a great variety today at Stylin' Stampin' INKspiration; make sure you check them all out!


I've been wanting the Remarkable You stamp set for some time now, and jumped at the chance when it was on sale last week as part of the Weekly Deals. My new favorite product is the Gold Glitter Ribbon.

  • Tangelo Twist card base - 5-1/2" x 8-1/2, scored at 4-1/4"
  • Boho Chic Embossing Folder
  • Remarkable You stamp set
  • Basic Gray Archival ink
  • Tangelo Twist ink
  • Shimmery White card stock - 3-3/4" x 5"
  • So Saffron card stock
  • Lots of Labels framelits
  • 3/8" Gold & White Glitter Ribbon
  • Neutral Candy Dots (Sahara Sand)

Built for Free Using: My Stampin Blog

8.26.2015

Mystery Supply Challenge

This was a super fun challenge that evolved "by mistake" last month. I had asked Kim to send me some "Bones" stamped images for a different post, and she asked which colors, etc I would like them in. I told her to surprise me. That led a few of the other DT members to say that would send them in to a panic. Thus the Mystery Supply Challenge was born.

We signed up, Kim assigned us who we would send items to, and then we sent our assigned person three Stampin' Up! items that they had to use on their card or project. Jenny G sent me this:


Ok, so not really. Abby just felt like she needed to help me out. What Jenny really sent was:


This super scary Perfect Peacock stamp which she stamped on Shimmery White in the new Black Archival ink that comes out next week! She also sent me one Antique Brad and some Wisteria Wonder Seam Binding.

The peacock became less scary as I started coloring it, and actually made my stress headache go away. I also discovered that the Shimmery White works very well with our Stampin' Write markers for coloring. I added a greeting from the Work of Art stamp set, and here is my finished product:


I wish that you could see this card in person, because no pictures will do the shimmery part of it justice!

I hope that you enjoy checking out this challenge as much as we enjoyed swapping with each other and stretching our creativity! Check out the other projects at Stylin' Stampin' INKspiration, and you'll want to visit each designer's blog to see what their challenge items were!

8.25.2015

Weekly Deals

Check out the current Weekly Deals from Stampin' Up!


Order online at stampinup.com and choose Darcy Johnson as your demonstrator. Or message me with your order!

Happy saving!

8.19.2015

Stamp Set Focus: Background Stamps

My inspiration for this card actually came from Pinterest. Isn't that dahlia gorgeous?


I decide to recreate the feel of the purple edges by heat embossing the Definitely Dahlia stamp on Whisper White card stock with Clear embossing powder. Then I sponged the entire layer with Rich Razzleberry ink.


Stampin' Up! has a wide variety of background stamps in the current catalog. Stop over at Stylin' Stampin' INKspriation to see which ones the other designers used.

Built for Free Using: My Stampin Blog

8.05.2015

Product Focus: Washi Tape

Stampin' Up! has so many great collections of washi tape in this catalog.


Washi tape is so easy to use and is fairly forgiving if you need to reposition. Some retired washi tape is even holding my list of design team projects on the wall above my stamp table.

I really feel like all of the current collections can be mixed and matched for even more creative fun. However, today I decided to use three out of the Cherry On Top collection.


I covered a 3-3/4" x 5" piece of Whisper White with my washi tape. I really wanted the washi to be the focus of my card, so I chose to use Whisper White for the rest of the card. I used the largest tag framelit to cut my top layer before adhering it with Stampin' Dimensionals. Then I used the Expressions Natural Elements for the first time. I attached it with a little Tombow Liquid Glue.
For those that feel they are stamping challenged, here is the card for you. No stamping!

Check out the other cute and inspiring projects from the design team at Stylin' Stampin' INKspiration.

Built for Free Using: My Stampin Blog

8.04.2015

Technique Tuesday: Layered Heat Embossing

Today at Stylin' Stampin' INKspiration, we are featuring a fun technique of layered heat embossing. Heat embossing has always been one of my favorite forms of embellishing a card, yet it never crossed my mind to layer the embossing until I came across this great tutorial that Wendy made.

I happened to have coffee filters in my house even though I'm not a coffee drinker. I bought them to make yogurt cheese, and have a LOT left. So I've been using them for my embossing powders like she demonstrated. GENIUS!


I did use a few retired embossing powders on this card, however the Cherry Cobbler is current! I also used Tangerine Tango, Early Espresso, and Tempting Turquoise.

My husband never ceases to surprise me. Out of the four cards I made today. He said this was his favorite. What are your thoughts on it?

Built for Free Using: My Stampin Blog

8.03.2015

#SSINKCC24: Color Challenge


I was going for a back to school color theme when I created this color challenge. What do you think? It ended up extremely versatile. You will have to check out the other designers' projects!


I love the Feel Goods stamp set. All of the greetings are fabulous and make for a quick card that has so much meaning.

Please stop over at Stylin' Stampin' INKSpiration today for more ideas, and play along with us as well!

Built for Free Using: My Stampin Blog

7.31.2015

Friday Favorites

Can you believe that we've already reached the end of July? That means we're getting closer to my favorite season, Fall! Speaking of favorites, the designers at Stylin' Stampin' INKspiration are sharing their current favorite products today.


My favorite is the Watercolor Wash stamp. It is one of Stampin' Up!'s background stamps, which are meant to cover a good portion of a quarter sheet of card stock. I love that it provides a bold, solid canvas to work with that only requires a few finishing touches be added!

What is currently your favorite Stampin' Up! product? Leave a comment below and receive something special from me!

Built for Free Using: My Stampin Blog

7.30.2015

Garden Birthday

Ok, not to toot my own horn; but I think this might be my favorite card that I've made in quite some time. I don't know if it's the embellishments or the color combination, but it all makes me really happy!


I was kind of struggling with what I was going to do to make a birthday card; and then this one suddenly came together. I knew I wanted to use the Tin of Cards stamp set, because the fonts are so elegant. As I mentioned Monday, I am absolutely in love with the patterns of the Designer Series Paper color family stacks this year! I folded the Tip Top Taupe trim up on top of itself and it added a soft new texture to the card.

Have a lot of birthdays coming up that you need to make cards for? There's more inspiration today at Stylin' Stampin' INKspiration!

Built for Free Using: My Stampin Blog

7.29.2015

Product Focus: Sequins

Have you played with any of the Stampin' Up! sequins? They add just the right amount of sparkle to any project. I don't remember why now, but I was flipping through the Annual Catalog before I made this card, and was inspired by the card on page 113. In fact I was so inspired I decided to CASE it.


I changed a few of the colors and embellishments around. Then I decided to "Step Up" the card by adding the sequins. In this case, I used some of the sequins from the Gold Sequin Trim. Sequins are one of those embellishments that you can always easily use to give your project that extra pizzaz.

Thanks for stopping by today. If your name is secretly Lorelai Gilmore, then I know you won't be able to resist checking out more sequined goodness at Stylin' Stampin' INKspiration.

Built for Free Using: My Stampin Blog

7.28.2015

Quick & Easy Cards

My followers probably know me well enough by now to know that Project Life by Stampin' Up! card kits are my go to source for a quick and easy card. Today was no exception!


The heart patterned card from Moments Like These made the perfect background. Add some of that yummy Cucumber Crush Lace Trim and you're over half done! Quick, quick; head over to Stylin' Stampin' INKspiration for some more easy cards to CASE!
Built for Free Using: My Stampin Blog

7.27.2015

Masculine Monday

A year ago, the Masculine Monday posts scared me and I avoided them like the plague. Now I rather enjoy them. Even though I'm more comfortable with them, it still poses a challenge to me.


I didn't mean for this one to come across so Army, but I think it does and I really like it. Do you think it does too? 

I just love the patterns in the Designer Series Paper Stacks this year and how versatile they are. I like the Chevron Border Punch, but I think my favorite element on this card is the stars that I stamped from Perfect Pennants and then cut out. 

Check out the other designers' masculine cards today at Stylin' Stampin' INKspiration. 

Built for Free Using: My Stampin Blog

7.21.2015

Perpetual Calendar Kit

Today at Stylin' Stampin' INKspiration we are featuring our favorite Stampin' Up! kits and various ways to use them.

I am using the Perpetual Birthday Calendar Kit. Maybe this way I'll finally get birthday cards out to people on time!


It comes in it's own nifty box which makes it great for gift giving!


All together on the board.


How I decorated it.


I even decorated the bottom corners of most of them. The stars in a J pattern on this one were unintentional! 

7.20.2015

#SSINKLS23: Layout Sketch


This is such a fun sketch, I just had to play along for the SSINK design team this week. You can play along with us too! Look for details below.

Last week, I used Project Life for some of my fish pictures from last summer. The circles on this layout told me that I needed to do the same. Originally, I was going to make my circles air bubbles for one of the fish in the pictures. Then as I started going through pictures, another thought came to mind!


The jellyfish were just begging to be punched out with my circle punches! I also found a bit in the SeaLife book that we had purchased that fit along with this page because the DH kept saying, "your upper left corner needs something."

The layering pieces came from two Project Life card collections. The top one was This Is The Life, and the bottom one was Let's Get Away. (I think. I could have those backwards.) The washi tape is definitely from the Let's Get Away card collection!

The gals at Stylin' Stampin' INKspiration LOVE when our readers play along with our sketch challenges! We would love for you to join us! It is even allowed for you to make a card inspired by this layout sketch if scrapbooking isn't your thing. If you don't have a blog, you can link to whatever gallery you've posted your project to! Show us what you've got!

7.17.2015

Project Life & Fishies

Sadly I'm way behind on my scrapbooking. Like a year behind. :(
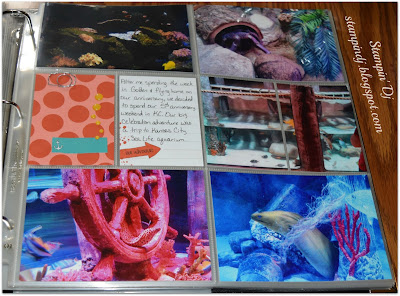
*cue Stage Left* Enter Project Life by Stampin' Up! I was able to create this page in nothing flat thanks to the ease of use and great card collections that we offer! The two cards and all of the embellishments on this page came from the Let's Get Away collection.


In the past I have struggled with this particular layout because of the smaller pockets, and not having many pictures I could cut down that small. I saw a great idea on Pinterest that I can't believe I didn't think of. Simply cut one of your 4" x 6" pictures in half and insert them side by side in those smaller pockets! Super easy and brought some more life to my page. I will admit I spent the most time looking for the perfect picture to cut down the middle. Most of them would have meant chopping a shark or other fish in half!

We've got plenty more Project Life inspiration for you today at Stylin' Stampin' INKspiration. Check it out!

7.13.2015

#SSINKCS23: Card Sketch

The day has finally arrived! It's the second Monday of July, so that means it is time for the July Card Sketch Challenge at SSINK! Bree sure did give me a run for my money with this one. I grabbed this challenge by the horns and am pretty happy with the outcome!


Seriously, when I first looked at this sketch I thought, "what on earth am I going to do with this?" Then I thought that I just needed to create a shape in the center of my card. Framelits were my first thought, but I wanted to challenge myself a bit more. I had just finished up my blog hop card for last week, and had thought that I should use the "left over" pieces from the Banner Triple Punch. While I didn't use those actual left over pieces, I created some new ones for this card with Pacific Point and Real Red. Then I used the punch for the banner in the center as well.


Play along with our Design Team at Stylin' Stampin' INKspiration.

Built for Free Using: My Stampin Blog

7.10.2015

Product Focus: Designer Series Paper

The Bohemian Designer Series Paper was the very first item that went on my Stampin' Up! preorder. It is very eye-catching. Apparently my husband thinks so too. I showed him the five cards that I made for this week, and this one was his favorite. When asked why, he replied, "I just like the colors."


What do you think? I love that it is so bold it can serve as the focal point of the card. I finally used the White Jute Ribbon that I've had for a while, and I have a tip. If you use the new Tear & Tape Adhesive with the Jute, it will stay put and you can't see it through the ribbon. At least I can't on this card.

The Design Team is featuring a variety of Designer Series Paper Packs, as well as a variety of ways to use the paper over at Stylin' Stampin' INKspiration.

Built for Free Using: My Stampin Blog